The pre-order add-on for ProductX lets you create products for pre-orders for the users. It’s an easy-to-use system with all the necessary functionalities for WooCommerce site owners. In order to use the pre-order add-on, you will need to have a Pro Version of the ProductX plugin. To install the pro version, check out the following link:
Here’s a quick video tutorial to show you how the pre-order add-on works:
Enabling the Pre-order Addon
Once your license is active, you will have access to all the features of the ProductX plugin. In order to use the ProductX Addon, you will have to:
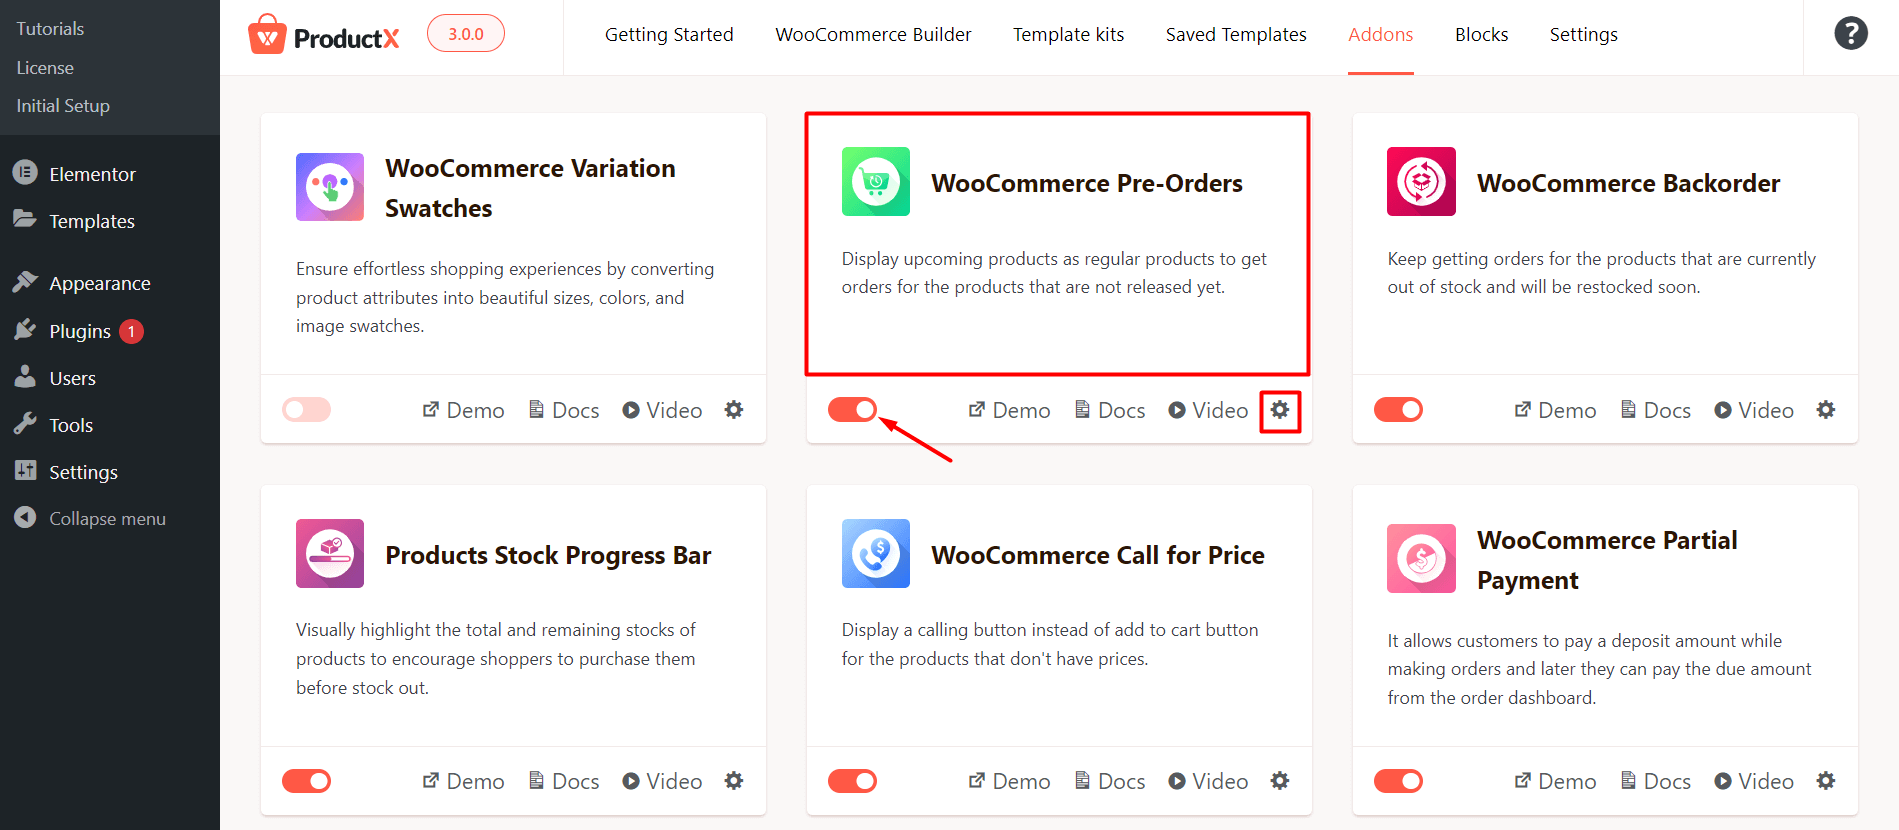
- From the ProductX menu on your WordPress dashboard, go to the add-ons.
- Now activate the pre-order addon.
Once you activate the pre-order add-on, you will see it in the settings section of ProductX from your WordPress dashboard.
Pre-Order Addon Settings
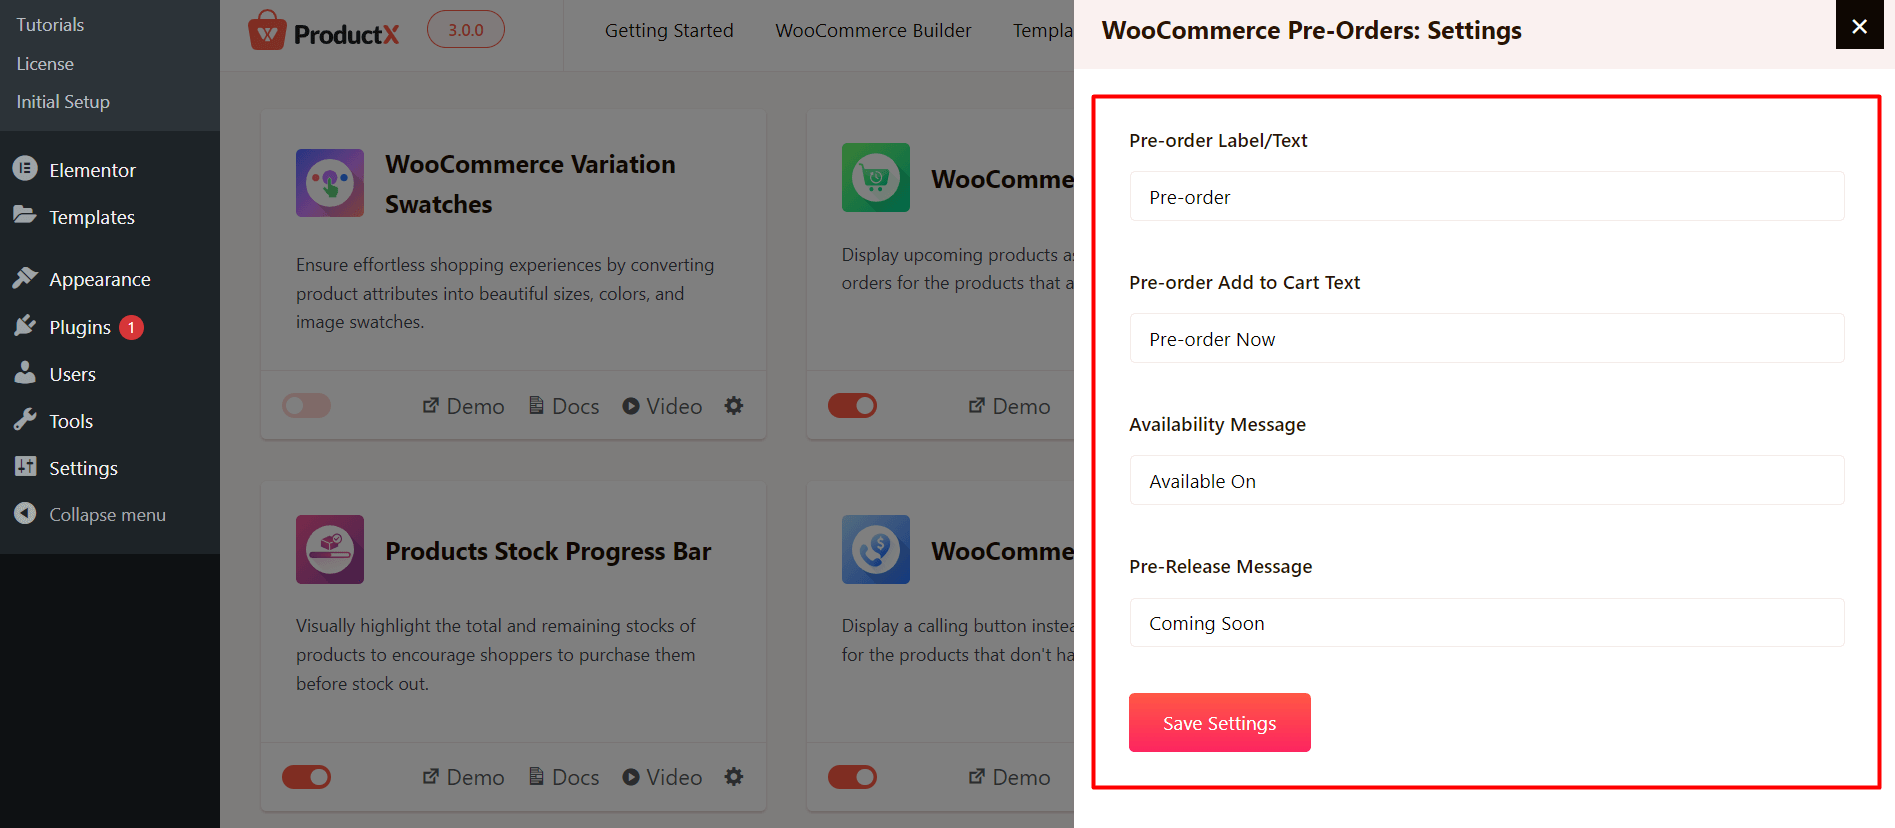
Pre-order Plugin Settings
There are four areas that are mentioned in the ProductX add-on settings. You can change the text labels and save changes. They will be applied directly to the pre-order products.
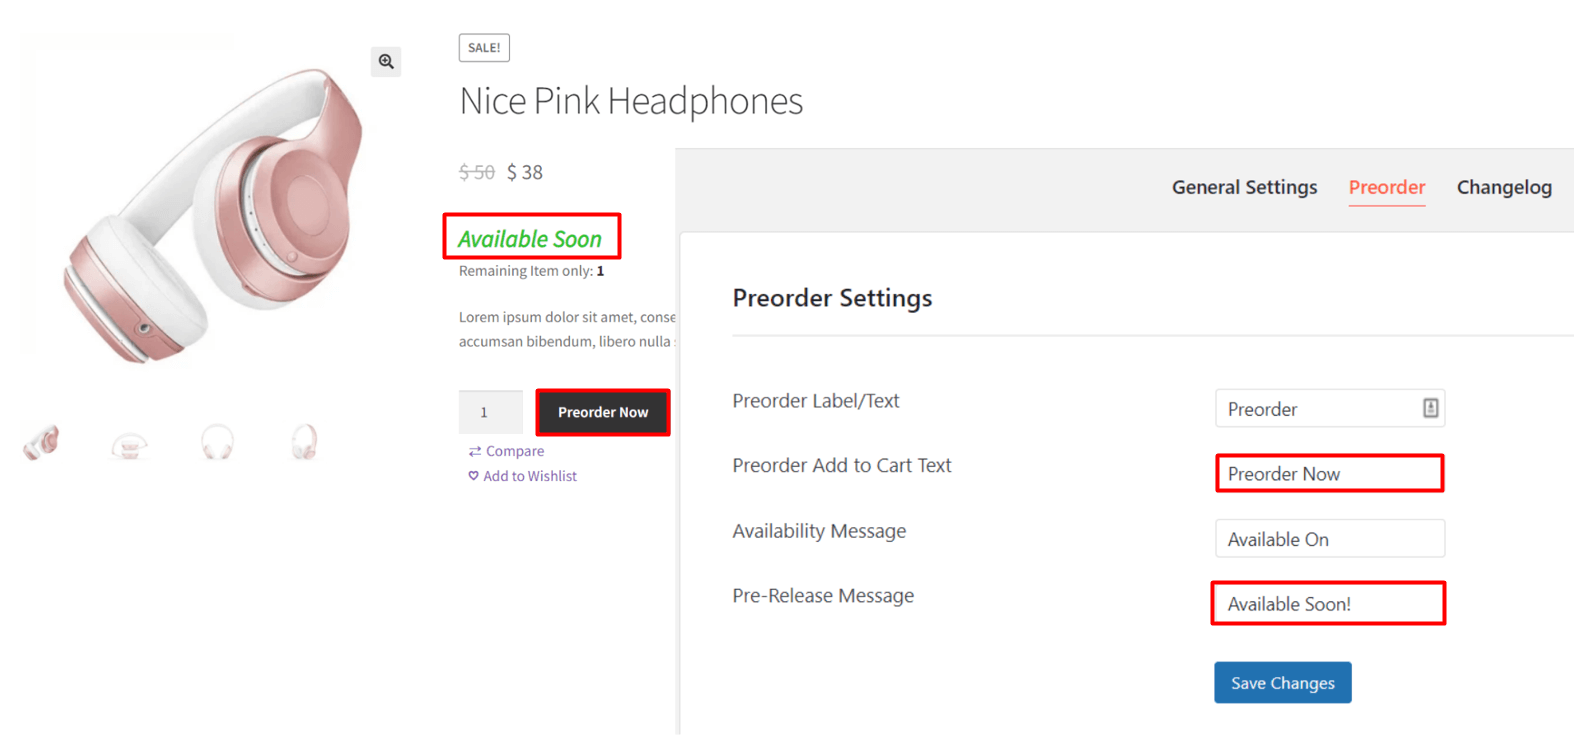
Note: The ‘Availability Message’ and the ‘Pre-release’ message will both be changed in the pre-order section of the products. So, the messages in these two sections will be inherited in the pre-order section of the products [It is true for the ProductX plugin only].
However, there have been some visual changes, here’s how the revamped settings look like:
Settings in the Product Data – for a Simple Product
If you want to add a product as a pre-order, then you will need to tick the pre-order section under Product Data.
In the pre-order section of the ProductX Product Data, you have the following sections:
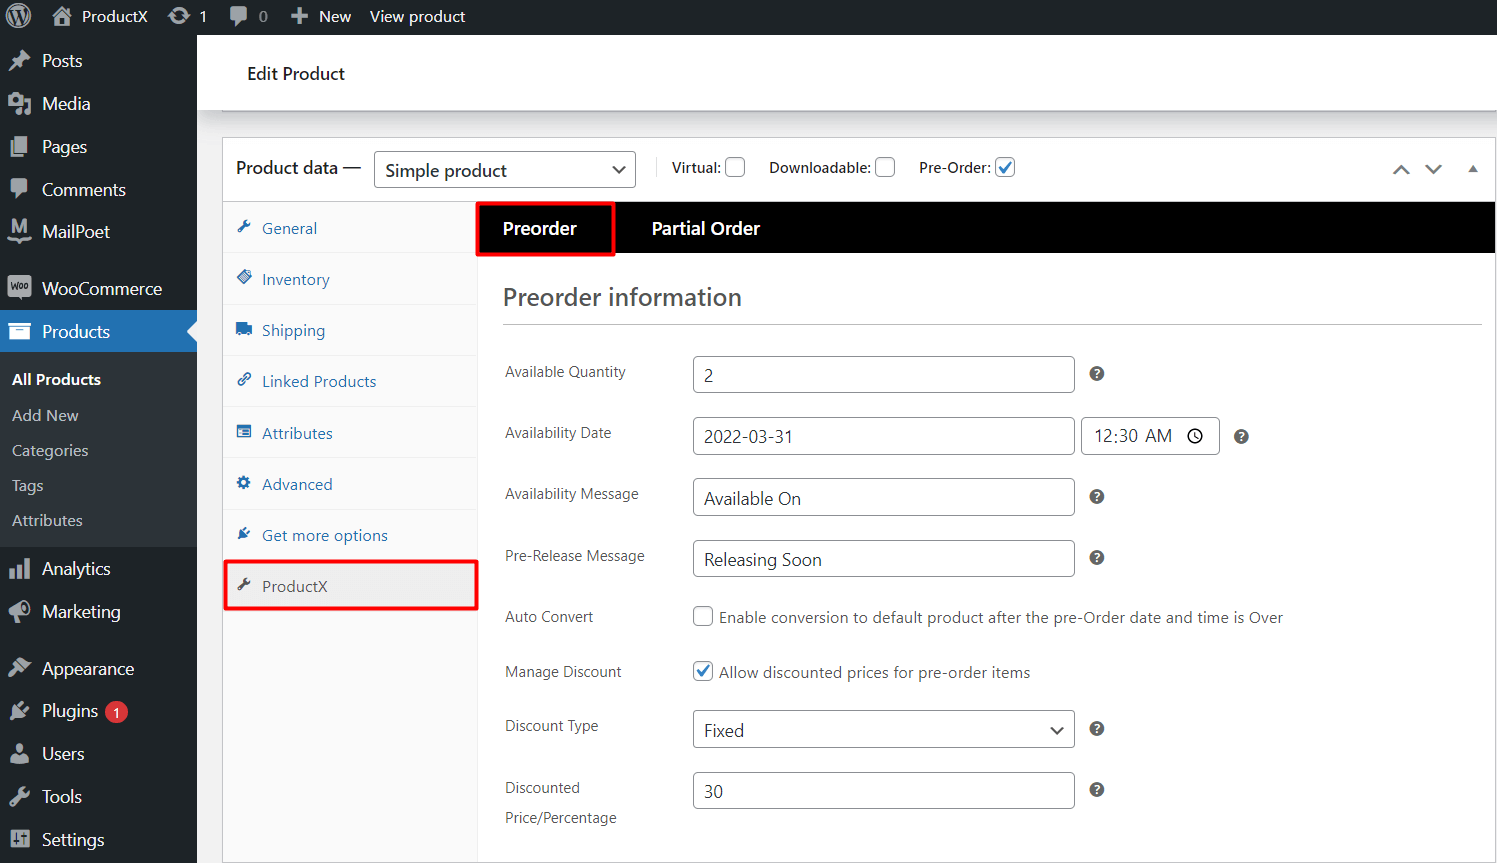
- Available Quantity: It is the maximum amount of products available for pre-order.
- Availability Date: It is the date and time to show when the product will be available.
- Availability Message: This is the message indicating date and time of the pre-order product availability.
- Pre-Release Message : This is the message if the pre-ordered product availability date and time are not given.
Note: The Availability Message and the Pre-release Message can be directly set from the settings menu in ProductX. The messages are inherited from the settings to ensure better ease of use.
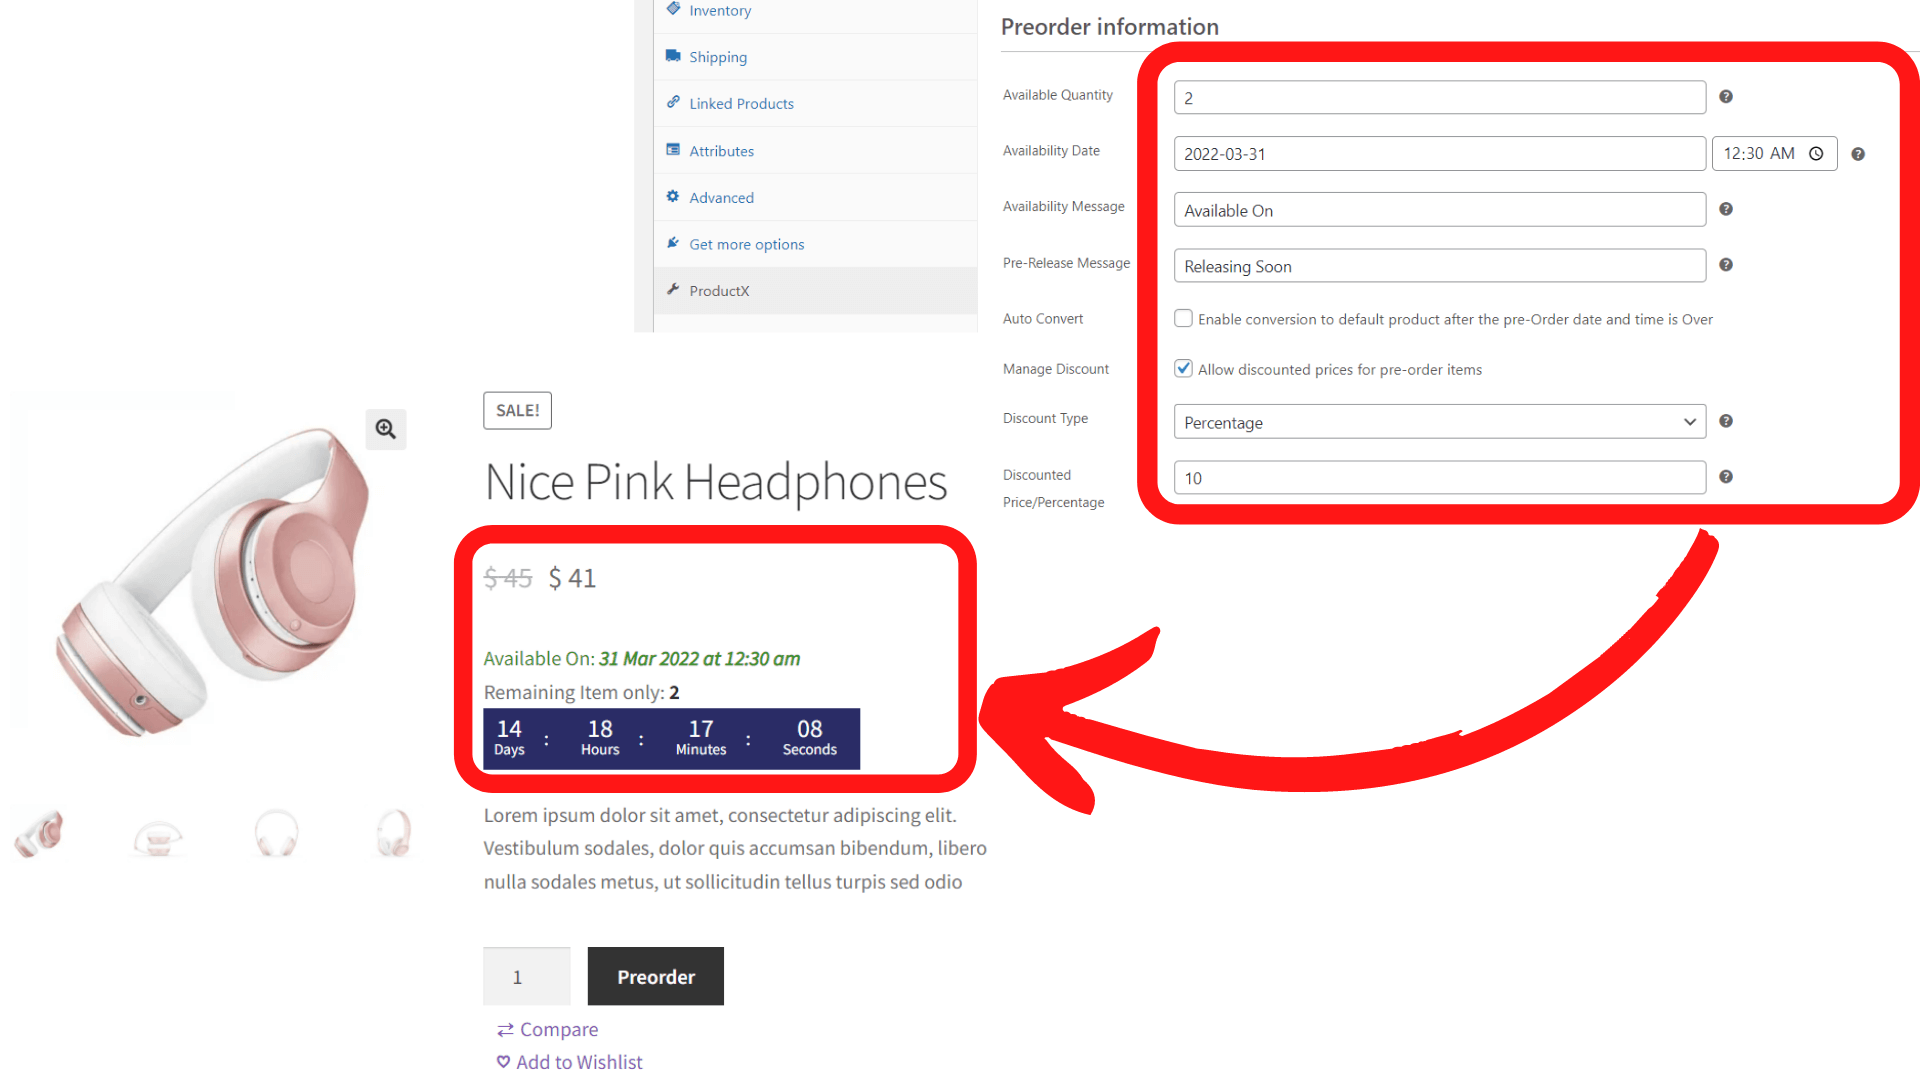
***The Auto Convert Feature allows you to transform your product into a default product once the release date for pre-ordering the product is over. You can enable or disable this feature as per your choice.
***You can also manage pre-order product discounts using the Manage Discounts section. You will be prompted to select the Discount Type using a dropdown. You are allowed to set two types of toggles: 1. Fixed Price 2. Discount Percentage. Once you set either one of the parameters, the discounted price will show up automatically for the product.
Settings in the Product Data- for Product Variations
You can create different product variations and set the pre-order data with ProductX. This way, you can manage multiple release dates, offer different pricing for different product variations, enable the Auto Convert feature differently for different variations of the product.
Once you create the product variations, you will meet the same settings as mentioned above for each product variation. This way, you can manage multiple product pre-order variations.

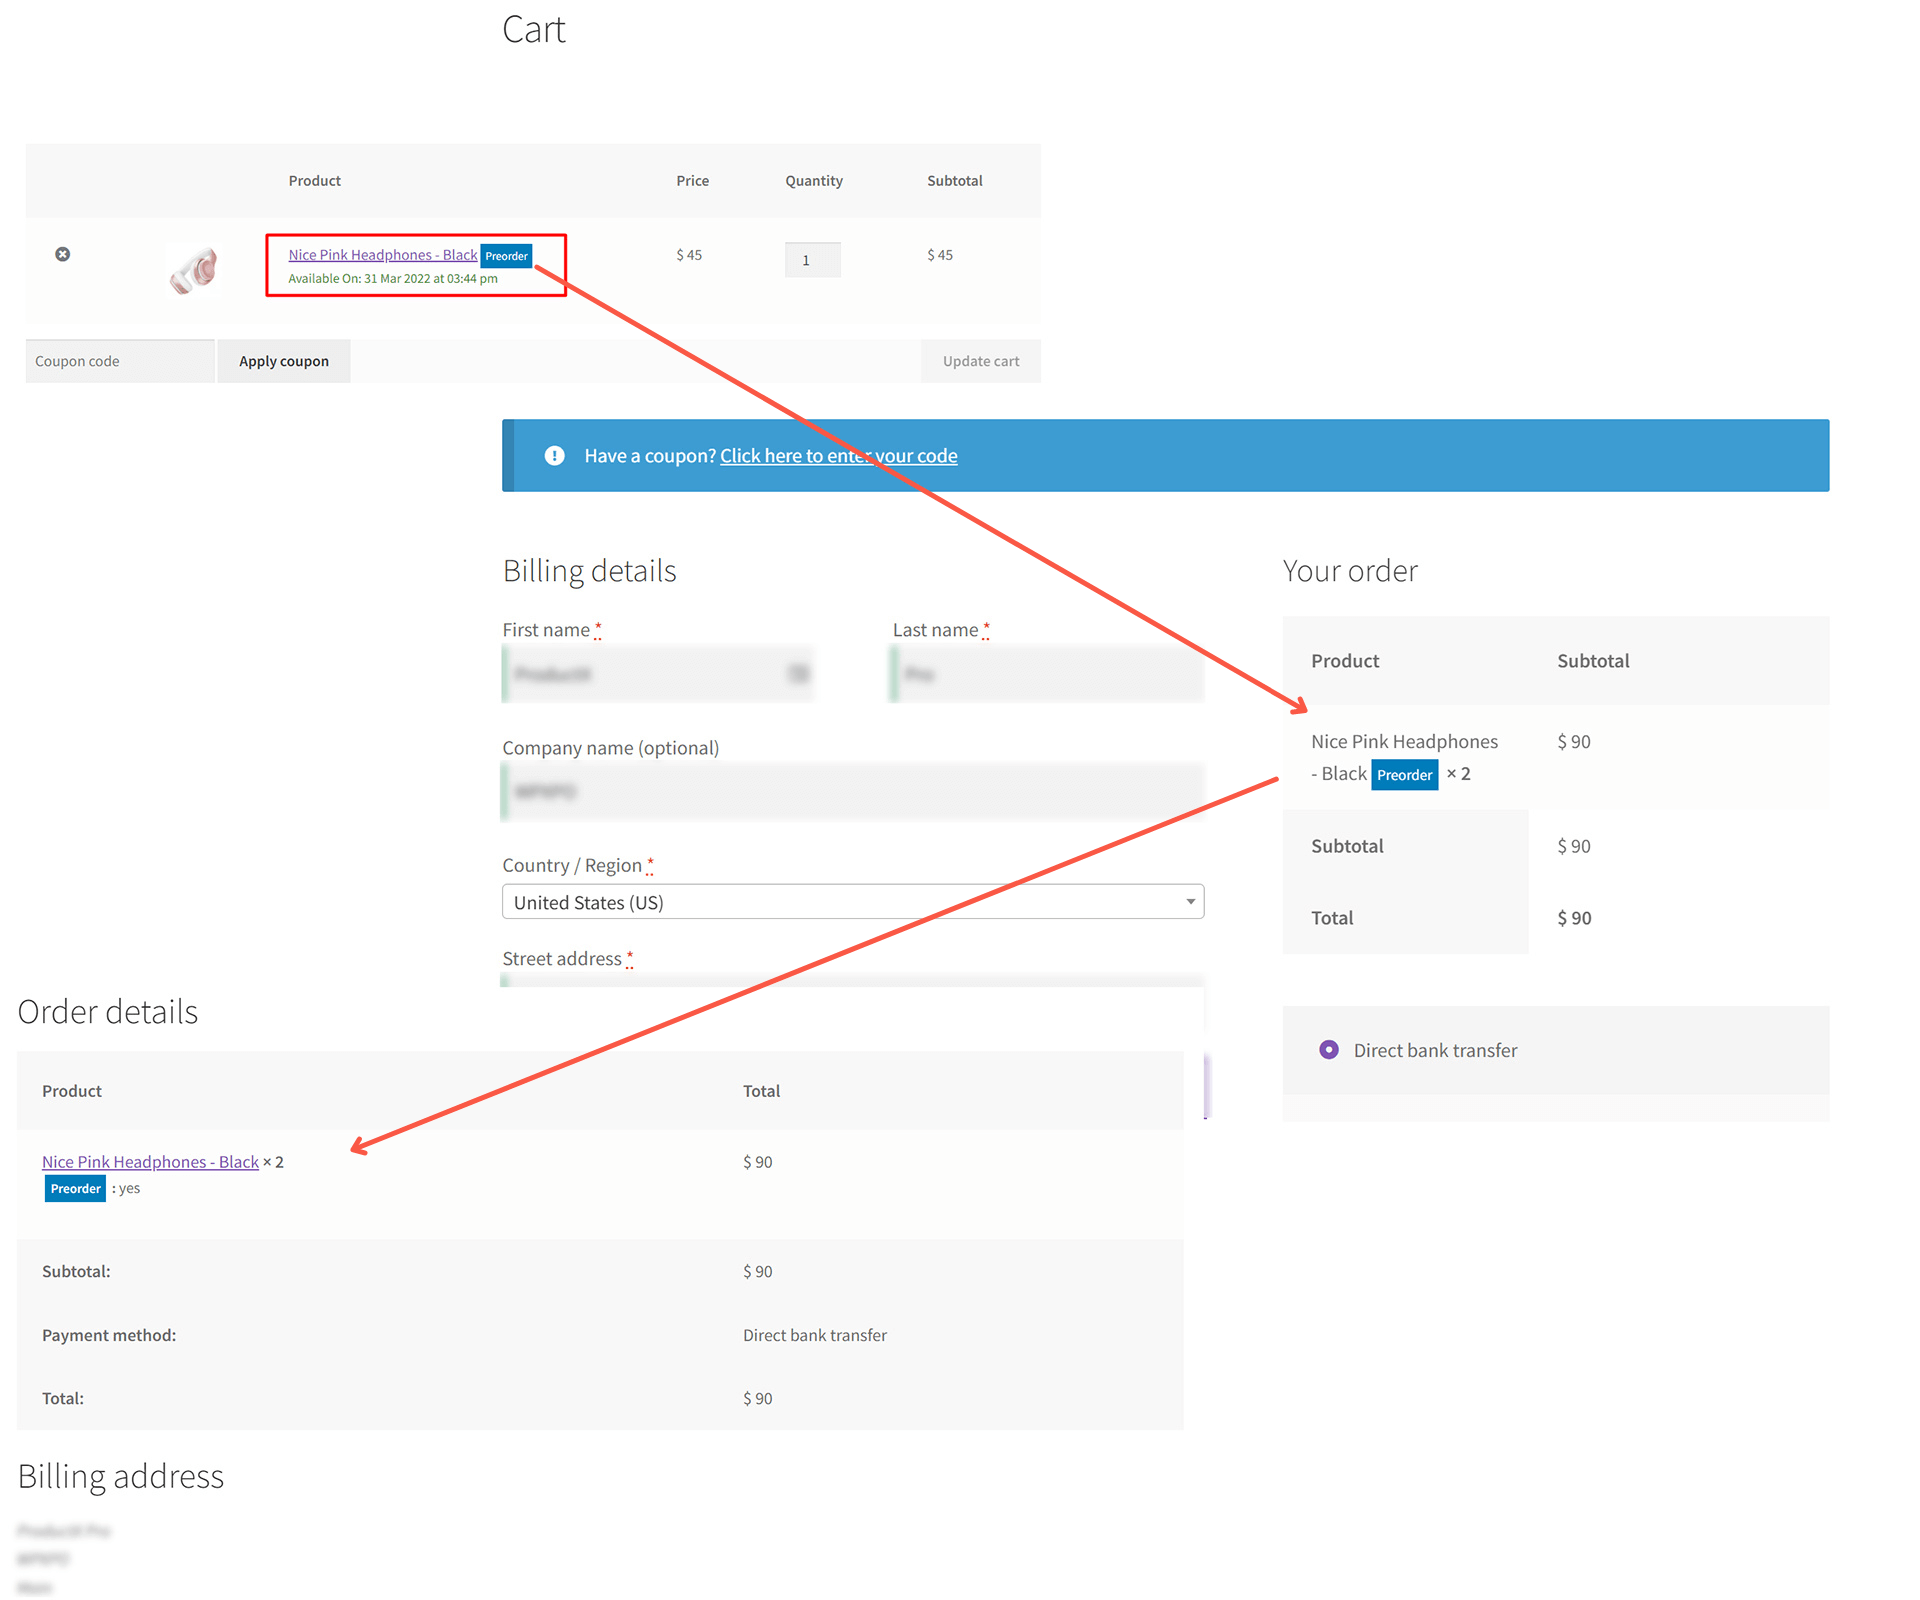
You can also see the pre-order text on the cart, checkout, and order page as well. Here’s what it looks like:
You can check out the following resources to learn more about the pre-order functionality of ProductX: